

Samwha-Dsp HP-54 4-Step Ventilation & Temperature Controller With NTC Sensor
Default Title
$147.33
Sale price
$147.33
Regular price
$0.00
Skip to product information





Samwha-Dsp HP-54 4-Step Ventilation & Temperature Controller With NTC Sensor
$147.33
Sale price
$147.33
Regular price
$0.00
Description
SPECIFICATIONS
Battery Included: no
Brand Name: samwhadsp
Cable length: 2m
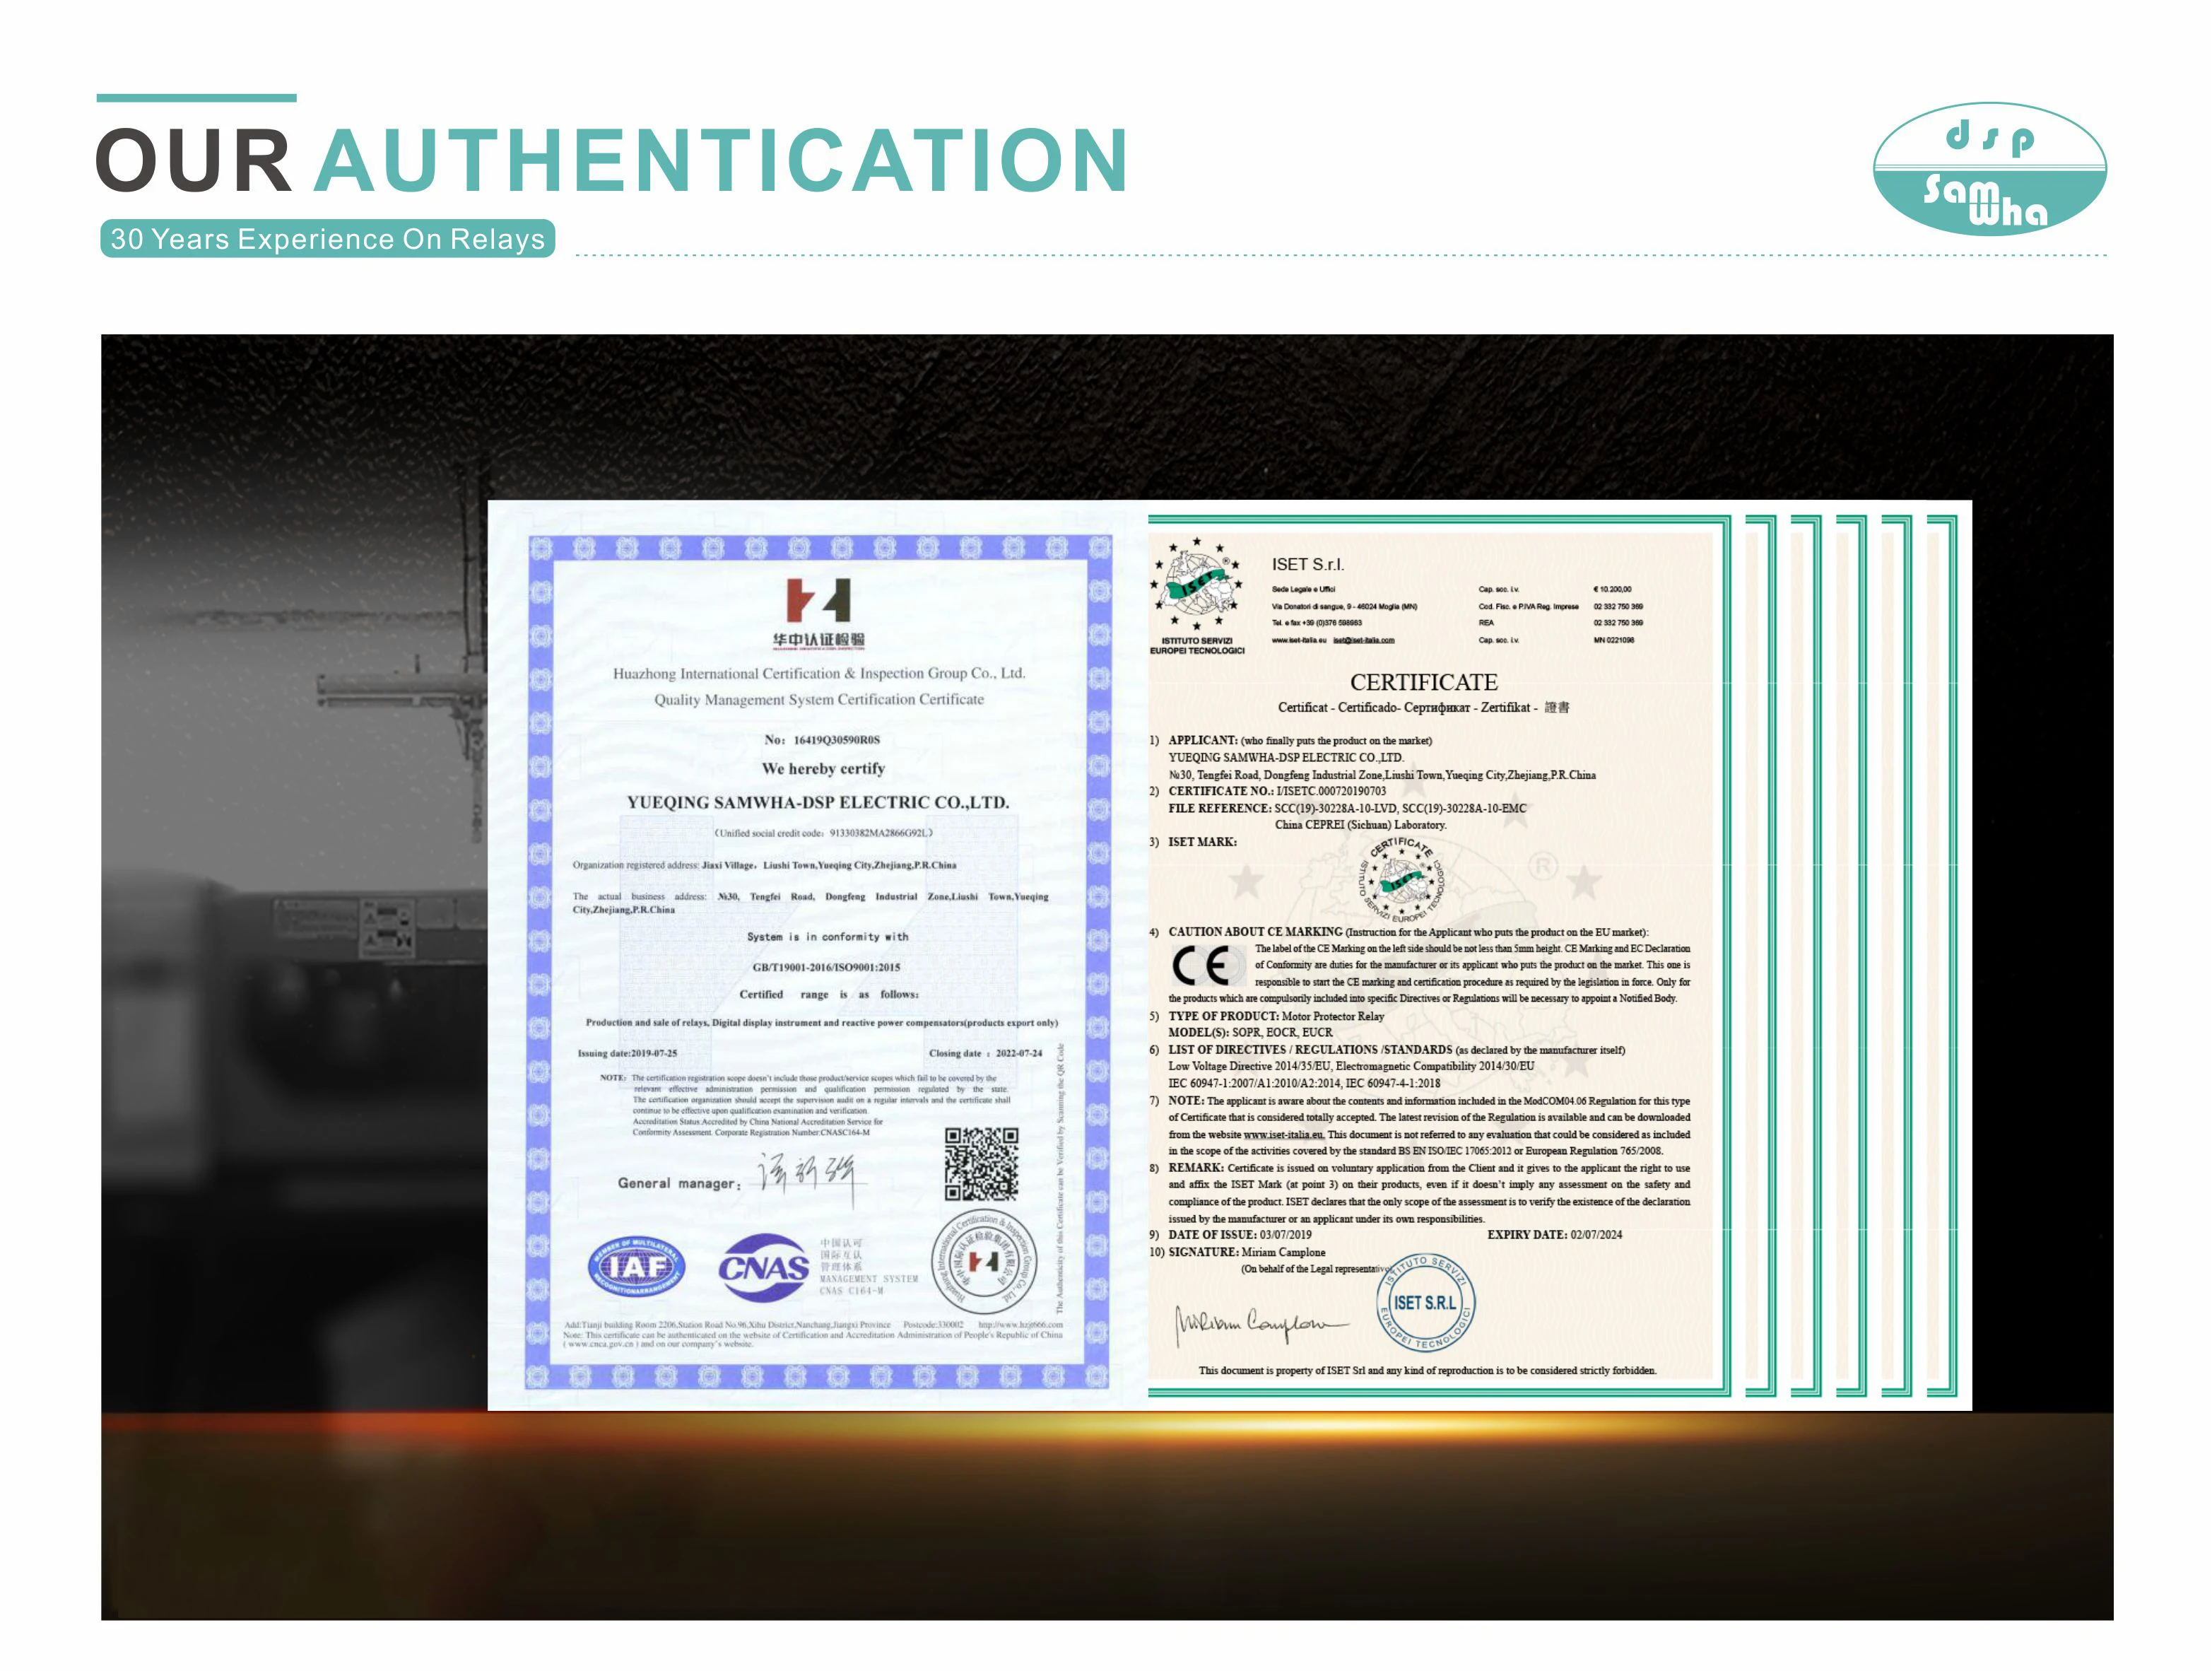
Certification: CE
Electronic: No
High-concerned chemical: none
Origin: Mainland China
Theory: Temperature Controller
Main Settings---------
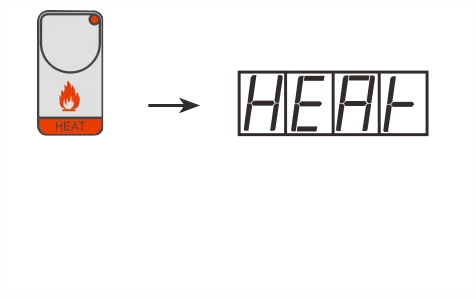
Heat Temperature Setting
Press HEAT:
This message will be displayed of the
set heat temperature value press + or - to modify, press HEAT to exit.
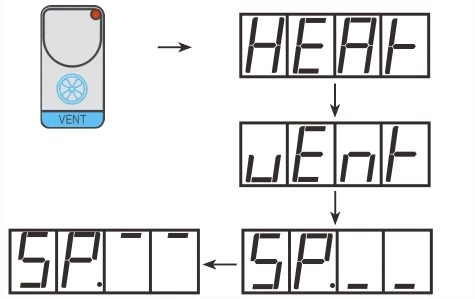
Ventilation Temperature Setting
Press VENT:
This message will be displayed is of the set ventilation temperature value (start first step)
Press + or - to modify, press VENT to confirm. At this point: This message is displayed, representing theminimum ventilation step (*).
Press + or - to modify, press VENT to confirm. At this point: This message is displayed, representing themaximum ventilation step (*).
Press + or - to modify, press VENT to confirm.
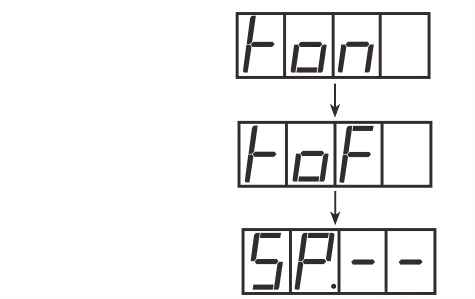
lf the minimum speed is set to 0, this message displayed is of the Set Shutter Running Time (seconds).
Press + or - to modify, press VENT to confirm. At this point: this message will be displayed of the Shutter Dwell Time (sec.).
Press + or - to modify, press VENT to confirm. At this point: this message will be displayed of the shut ventilation speed number.
Press + or - to modify, press VENT to exit.
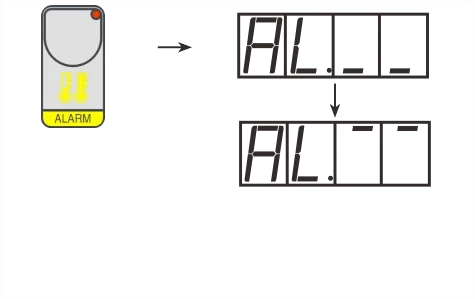
Alarm Parameter Setting.
Press ALARM :
This message will be displayed of the Set Minimum Alarm temperature value. Press + or - to modify, press ALARM to confirm.
At this point: this message will be displayed of the set Maximum Alarm temperature value. Press + or - to modify, press ALARM to exit.
Viewing Temperature Recording
will be displayed followed by
°Maximum Temperature Recording.
will be displayed followed by
°Minimum Temperature Recording.
Values recorder are memory permanent stored: for memory clear keep pushed + keys for more than3 seconds: CLEA message will be composed on display before clearing operation.
COST Programming (System Constants)
Press - / + at the same time for at least one second: the message C.0.S.t. will be displayed. Press than repeatedly ALARM until the message regarding the chosen variableis displayed (see table below): variable's value and message will be displayed. Press + or - to set a new value and then press ALARM to confirm.
The next system constant will then appear. You can press ALARM for at least 2 seconds to exit and return to the run mode.
Mess. Valore Meaning
d.HEA 0.2° °HEAT differential
rEL.1 0.0° °Temperature set of step 1
referred to the vEnt set.
rEL.2 1.0° °Temperature set of step 2
referred to the Step 1 start.
rEL.3 1.0° °Temperature set of step 3
referred to the Step 1 start.
rEL.4 1.0° °Temperature set of step 4
referred to the Step 1 start.
d.FAn 0.2° °Ventilation differential.
r.COL 6.0° °COOL setting shift referring
to vEnt set.
d.COL 0.2° °COOL differential.
tEnP =1 Temperature unit(=1: ℃,=2:
°F).
Ad.tE 0.0° °Temperature sensor
adjustment (+ or -).
tYPE 1 Start ventilation actioning
mode.
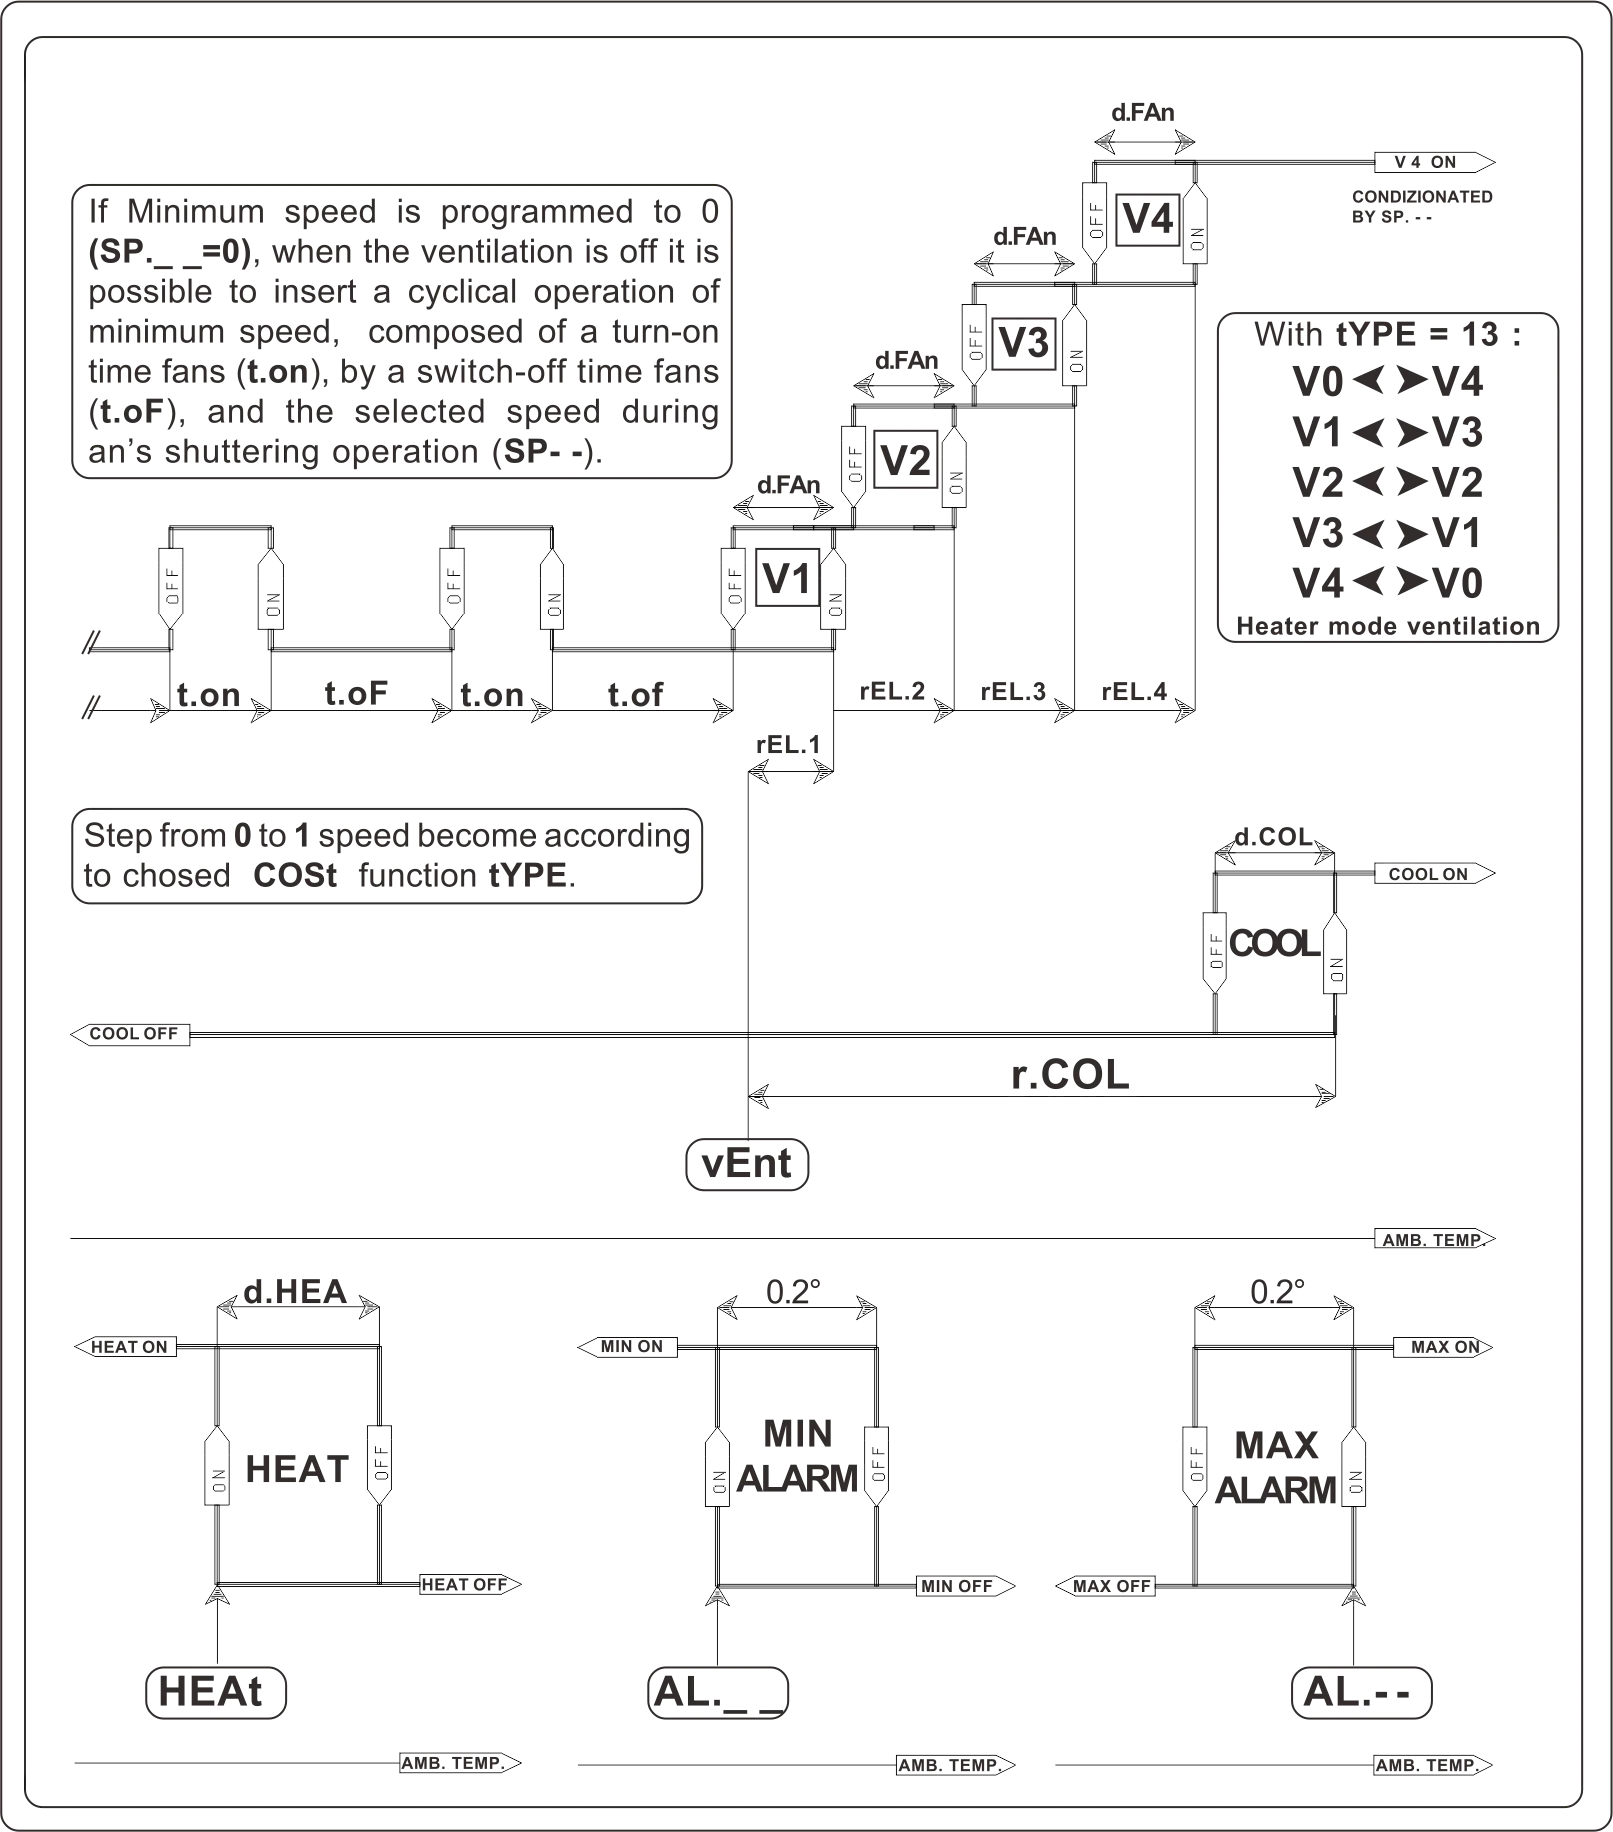
1)For more details see Operative Diagrams
2)You can correct the readings on the sensor (+ or -).
3)Different mode of ventilator initial start-up optionally settable (step from 0 to 1 speed).
tYPE= 1 : 0 to 1 step become in normal mode.
tYPE= 2 : 0 to 1 step become with a momentary 10 seconds at speed 2.
tYPE= 3 : 0 to 1 step become with a momentary 5 seconds at speed 3.
tYPE= 4 : 0 to 1 step become with a momentary 5 seconds at speed 4.
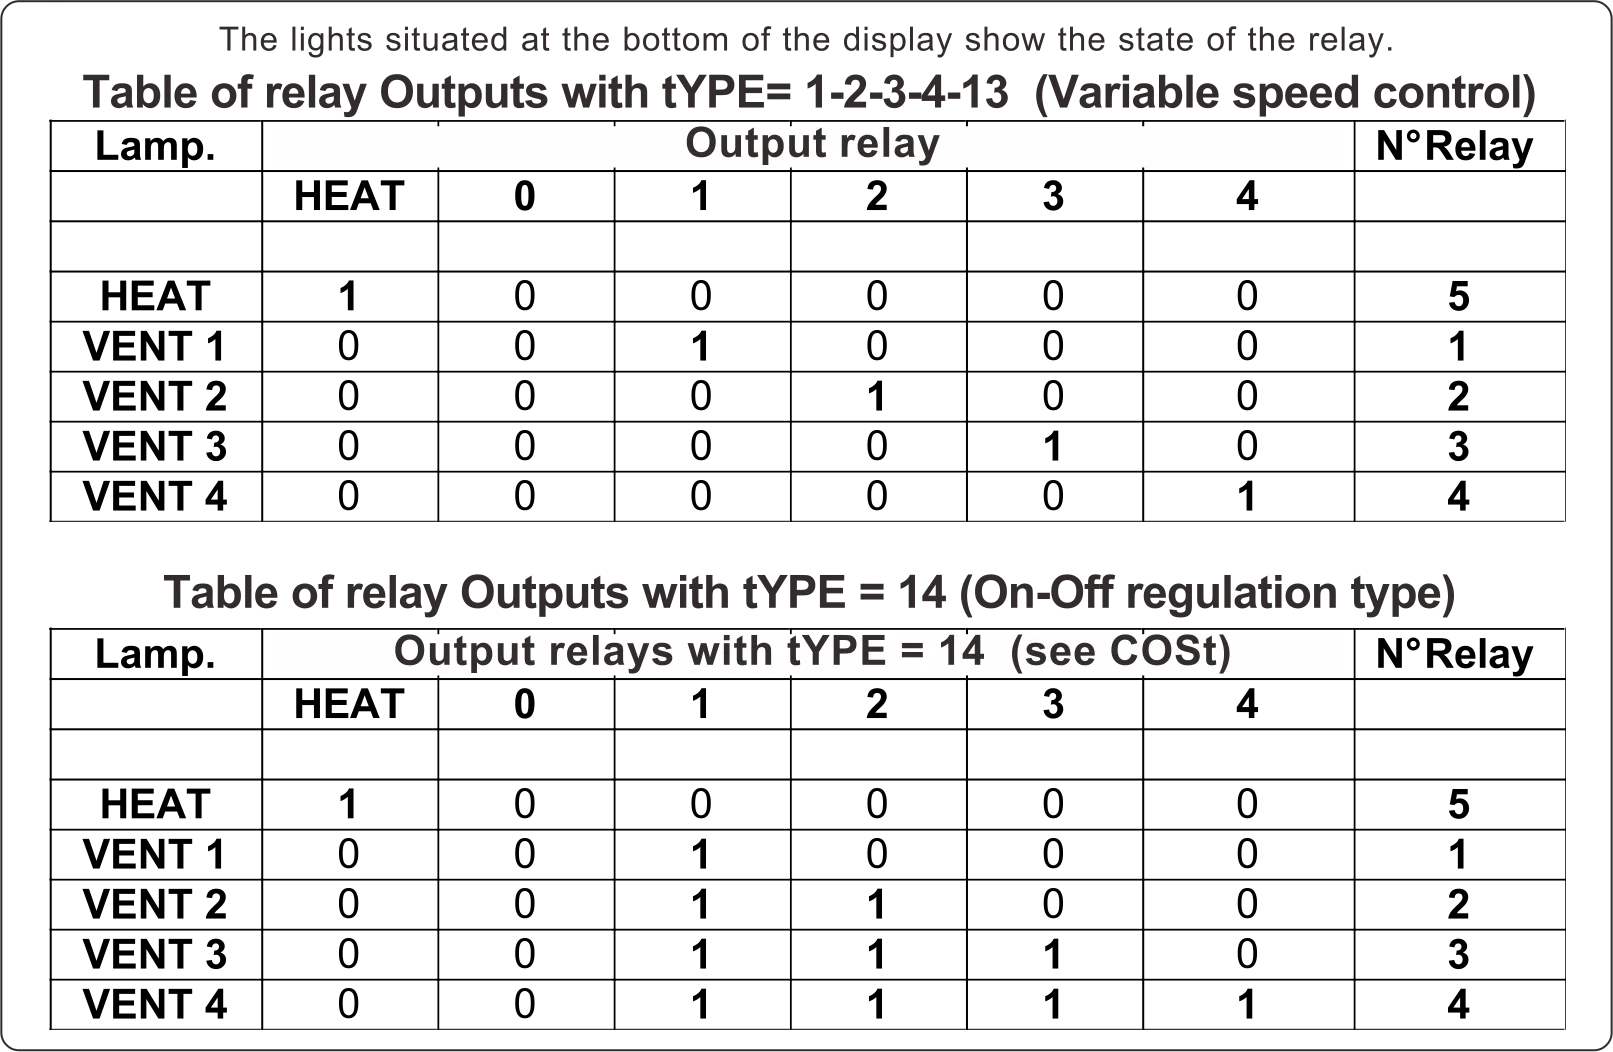
tYPE=13 : Heating mode ventilation.
tYPE=14 : Progressive ventilation contacts (On-Off regulation type).
Options 2, 3 , 4 permits to make an easy opening of shutter models ventilators.
Option 13 permits Heater mode ventilation (low temperature = higt speed; in other options high
temperature= high speed).
Option 14 permits On-Off regulation mode (in other condition regullation is for variable speed control).
Preset Programs (bootstrap)
This processor is already programmed with the following (variable) settings.
To return to these settings at any time you may:
Power off the processor, press MAX VENT key and keep it pressed giving power on: message will be displayed (release now MAX VENT key).
HEAt = 20.0° vEnt = 25.0° SP._ _=0 SP.--= 4 AL._ _=10.0° AL.-- = 40.0°
t.on = 10"t. oF = 60" SP.--= 0 The COSt values are shown in COSt Promagramming.
Manual Mode
ln some start-up conditions may be useful to work in "manual" mode:
Power off the processor, press + key and keep it pressed giving power on: HAnd message will be displayed (release now + key). Push +until is displayed number required to be handed (see table State indication lamps) and push ALARM for activing relay. Pushing again + for increase relay number previous relay is disactivated. You can press ALARM key for a least two seconds to escape and return to the Run Mode.
Operative Diagrams
Status Indication Lamps
Installation
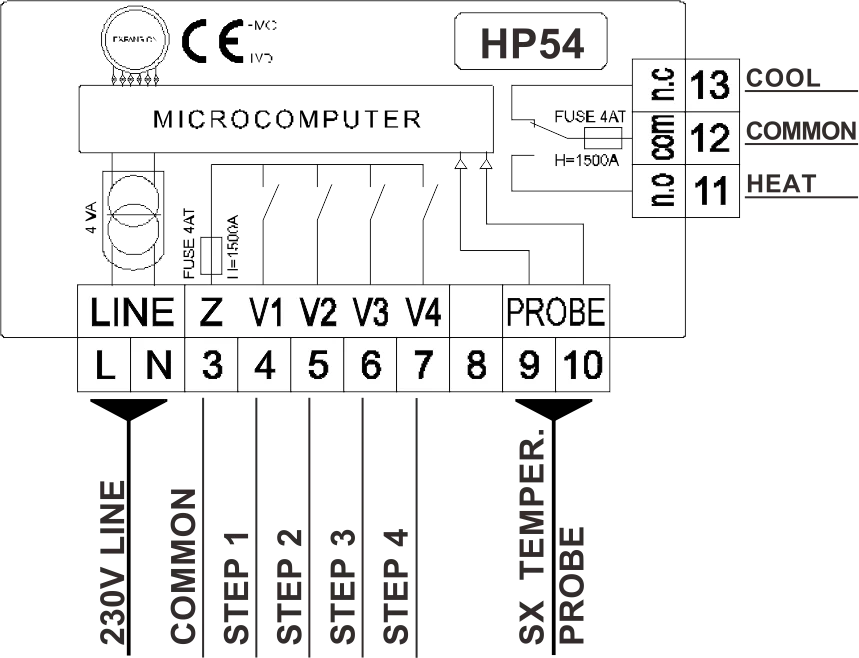
How to connect the line:
Connect 230V line on terminals L-N.Protect supply with adequate fuse.
How to connect the sensors:
Connect the provided sensor as shown in the diagram. For remote connections use astandard 0.5-square millimeter two-pole wire, taking great care over the connections by insulating and sealing the joins carefully. -O.C.- is displayed when the temperature sensor wiringis open, -s.c.- is displayed when thetemperature sensor wiring is short circuit.
How to connect the contacts:
Output contacts are N.O. (Normally Opened free of voltage) on wich is apliablea 4AMP AC1 maximum load.
3-4= Step 1 contact
3-5= Step 2 contact
3-6= Step 3 contact
3-7= Step 4 contact
11-12= Heat contact
12-13= Cool contact
Alarm and Cooling are available only with HPAL optional slot.
Free Shipping Over $199
- Standard Shipping: Standard Shipping (12–18 Business Days)
- Express Shipping: Expedited Shipping (5–9 Business Days)
- Free Shipping: Orders over $199 qualify automatically
- Tracking: Full tracking number provided for all orders
30-Day Return Policy
- Returns: 30-day hassle-free return window
- Condition: Items must be unused and in original packaging
- Refund: Full refund processed within 3-5 business days
Why Choose Us?
- Factory Direct: ISO/TS 16949 certified manufacturer
- Quality: 100% electrical continuity tested before shipment
- Experience: 15+ years in automotive connector industry
- Support: Professional technical support available

You may also like
Blog posts
Title
An excerpt of your blog post's content
Title
Date|Author
Subscribe to our emails
Be the first to know about new collections and special offers.